We promote woodcrafts to enable creativity and develop practical skills, whilst also building ever more familiarisation with the properties of different materials and the trees from which they originate.
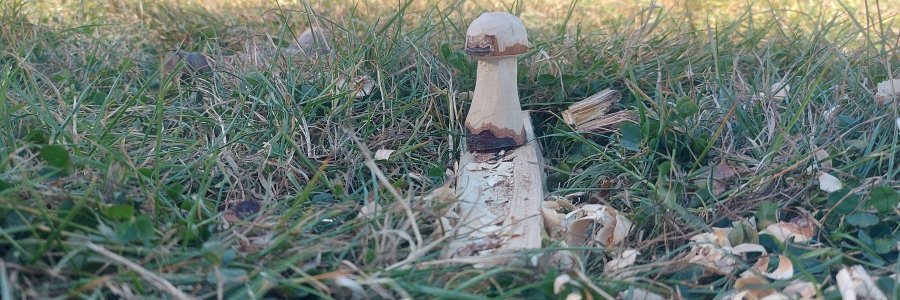
We encourage you to have a go at making a wooden mushroom, to create a showpiece for yourself or as a gift, and to build your knife skills with new or old tools.
There is a certain peace and satisfaction which comes with this kind of crafting - seeing a decorative (or useful) item form from raw materials and focussing your attention on the wood and blade directly in front of you. In recent times we call this "mindfulness", but there is also a highly valuable set of knowhow which was previously undertaken as a passtime and shared between generations, each person creating something unique, and we enjoy supporting you to reconnect with that way of life through our workshops and tailored courses.
What you need
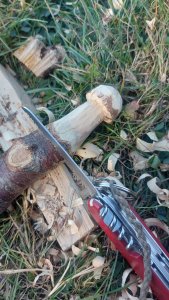
- A bladed tool - most simple woodcrafts need only a general penknife (folding blade less than 3 inches, to remain within UK law), although a specialised woodcrafting knife can be used to produce finer detail (such as the Mora 125 seen in photos on this page).
- A piece of wood to shape, approximately 20-30cm long for a 5-10cm mushroom plus working space. It's easier to start with a round section of approximately 2-4cm diameter (such as a broken sapling trunk, or side branch), but other shaped cross-sections can be used with a little more work.
- A block of wood to work on - for a stable working platform, to push against, for knife care and personal safety.
- Around 20-30 minutes - good for a lunchtime activity in a garden or park, but as always more time can be taken to refine the output.
A note on "green" wood vs seasoned for all woodcrafts
Wood pieces that have been recently cut from live trees will retain moisture for at least a couple of months, which makes them more easy to cut and work (fibres are softer) - these are known as being "green" wood, and are clearly good for getting quicker results, and therefore good for anyone new to working with bladed craft tools. The disadvantage of green wood is that the fibres will change shape as they dry, and there is an associated risk that your crafted piece will distort; this can be minimised by drying slowly by natural airflow away from direct sunlight.
Seasoned wood is often what people will have access to in typical urban residential environments, either as firewood or as building materials; the wood fibres have already been dried over a long time, to provide a stable resource for burning or construction. When working with seasoned wood, it will often be tougher to shape with a knife, requiring a smaller amount to be removed at a time, although this does depend on the origin and type of the wood.
Timber pieces taken from already-fallen branches on the woodland floor or from dead-standing trees will be more variable, and may already show signs of decomposition; this may not be evident until you start cutting into a workpiece, and may be a desirable effect, if you choose to use it!
How to Make a Woodcraft Mushroom (Step-by-step)
- Choose your work piece carefully - the original species of tree will impart different characteristics to the finished piece, either through bark colour and pattern (which you may leave in place) or from internal wood grain, colour or features such as passive fungus threads. Also look out for any knots (from side shoots) which will be an obstruction that is harder to work with.
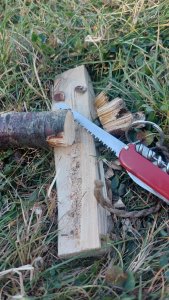
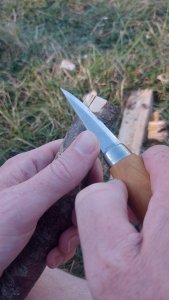
- Start by using a push-cut, to take small slices off the end of the wood, around the piece (holding the wood piece in one hand, use a thumb to push the knife at around 20 degrees into the end of the wood, keeping all fingers back from that end). This may be made easier by first sawing a flat end, but is not essential.
- Work around the end of the wood, adjusting the knife angle, to create first a rough dome, and then gradually shape this into your desired head/cap of the mushroom. You may decide to keep some of the bark intact, to represent a frill on the mushroom.
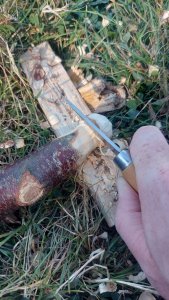
- Having produced an appropriate dome size and shape, you will have a feel for where this ends, and now need to cut across the piece of wood, knife held vertically and pressed into the surface, rotating the wood occasionally until a continuous band of cut is produced. This is known as a stopper-cut, and sets the place where we will begin the stem of our mushroom.
- As when first shaping the domed end of the wood, cut just below and towards the stop-cut line, with the knife at an angle, to remove a chunk and start the undercut.
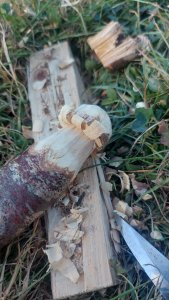
- Repeat this undercut all around the work piece, and continue cutting deeper with new stopper-cuts, until your desired (initial) definition of the top of the mushroom is visible - remember everything can be adjusted by cutting more wood away, but can't be added.
- Cutting longer slices toward the undercut "shelf"
- When you are happy with the shape and size of the mushroom, saw its base to remove from the original stick and complete it. (It is also possible to create a new stop-cut with a knife at this stage, then shape a new dome into the stop to immediately begin the next item!)